
Time tracking
A Timer attribute records how long work actually took. Unlike a plain number, it holds a list of individual time entries — one per sitting — and shows their total on the task.
Add one the same way as any other custom attribute: Settings → Attributes → New attribute, then pick the Timer type. A team can have more than one, if you want to track billable and internal time separately.
The timer panel
Section titled “The timer panel”Click a Timer value on a task — in the task detail panel or straight from a column in any list — to open it.
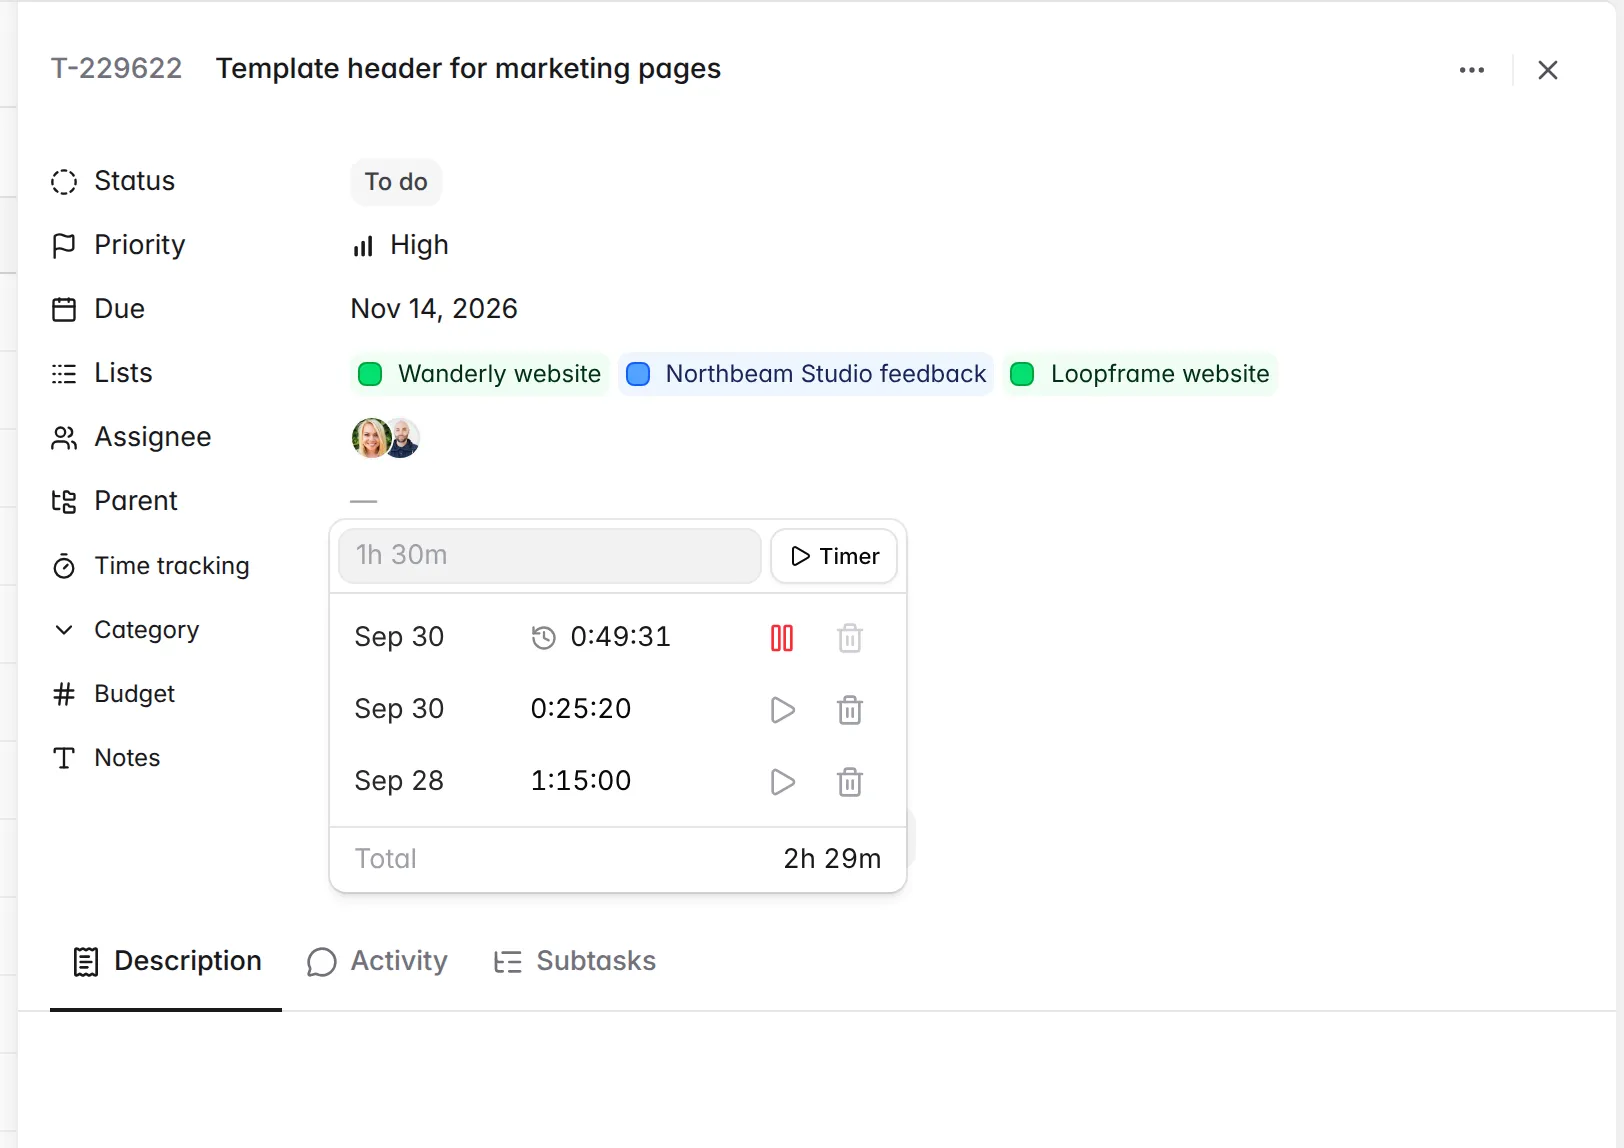
The top row does two different things depending on what you type:
- Leave the box empty and the button reads Timer. Pressing it starts recording immediately, and a new entry appears at the top of the list with a live clock.
- Type a duration into the box and the button becomes Add. Pressing it files that duration as a finished entry. Nothing starts recording — use this to log time after the fact.
Below the input, every entry shows the day it belongs to and how long it ran. Each one can be:
- played or paused with the button on the right,
- deleted with the bin icon,
- edited by clicking its duration and typing a new one.
A recording entry shows a ticking clock instead of an editable value — pause it first if you want to correct the time.
Only one timer runs at a time
Section titled “Only one timer runs at a time”Starting a timer stops whatever you already had running, including on a different task. This is deliberate: you can only really work on one thing at once, and it means you never quietly accumulate time against a task you stopped working on hours ago.
Nothing is lost when a timer is stopped this way. The time it had run is banked into its entry, and pressing play on that entry later picks up where it left off.
Seeing what is running
Section titled “Seeing what is running”Whenever something is recording, a timer icon appears at the bottom of the sidebar, next to the + button. Hover it to see which task it belongs to and how long it has been going; click it to jump straight to that task.
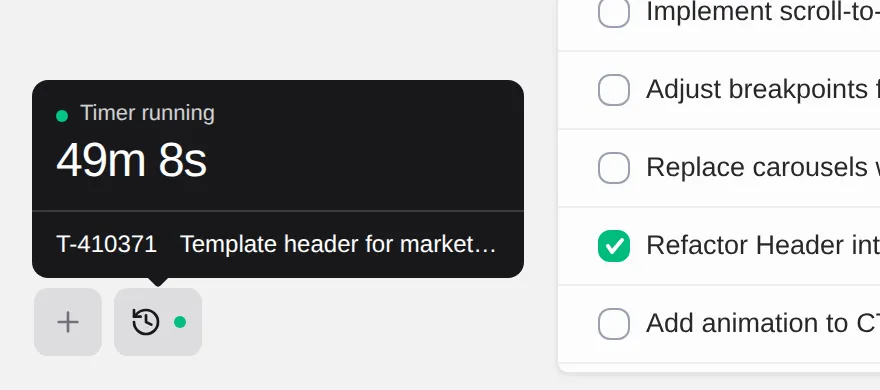
It follows whichever timer is currently running, so it always names the thing you are actually working on.
In lists and boards
Section titled “In lists and boards”Add the attribute as a column (Display options → Add attribute) to see totals across a whole list at a glance. A pulsing clock beside the value marks a running timer, and the value keeps climbing while it runs.
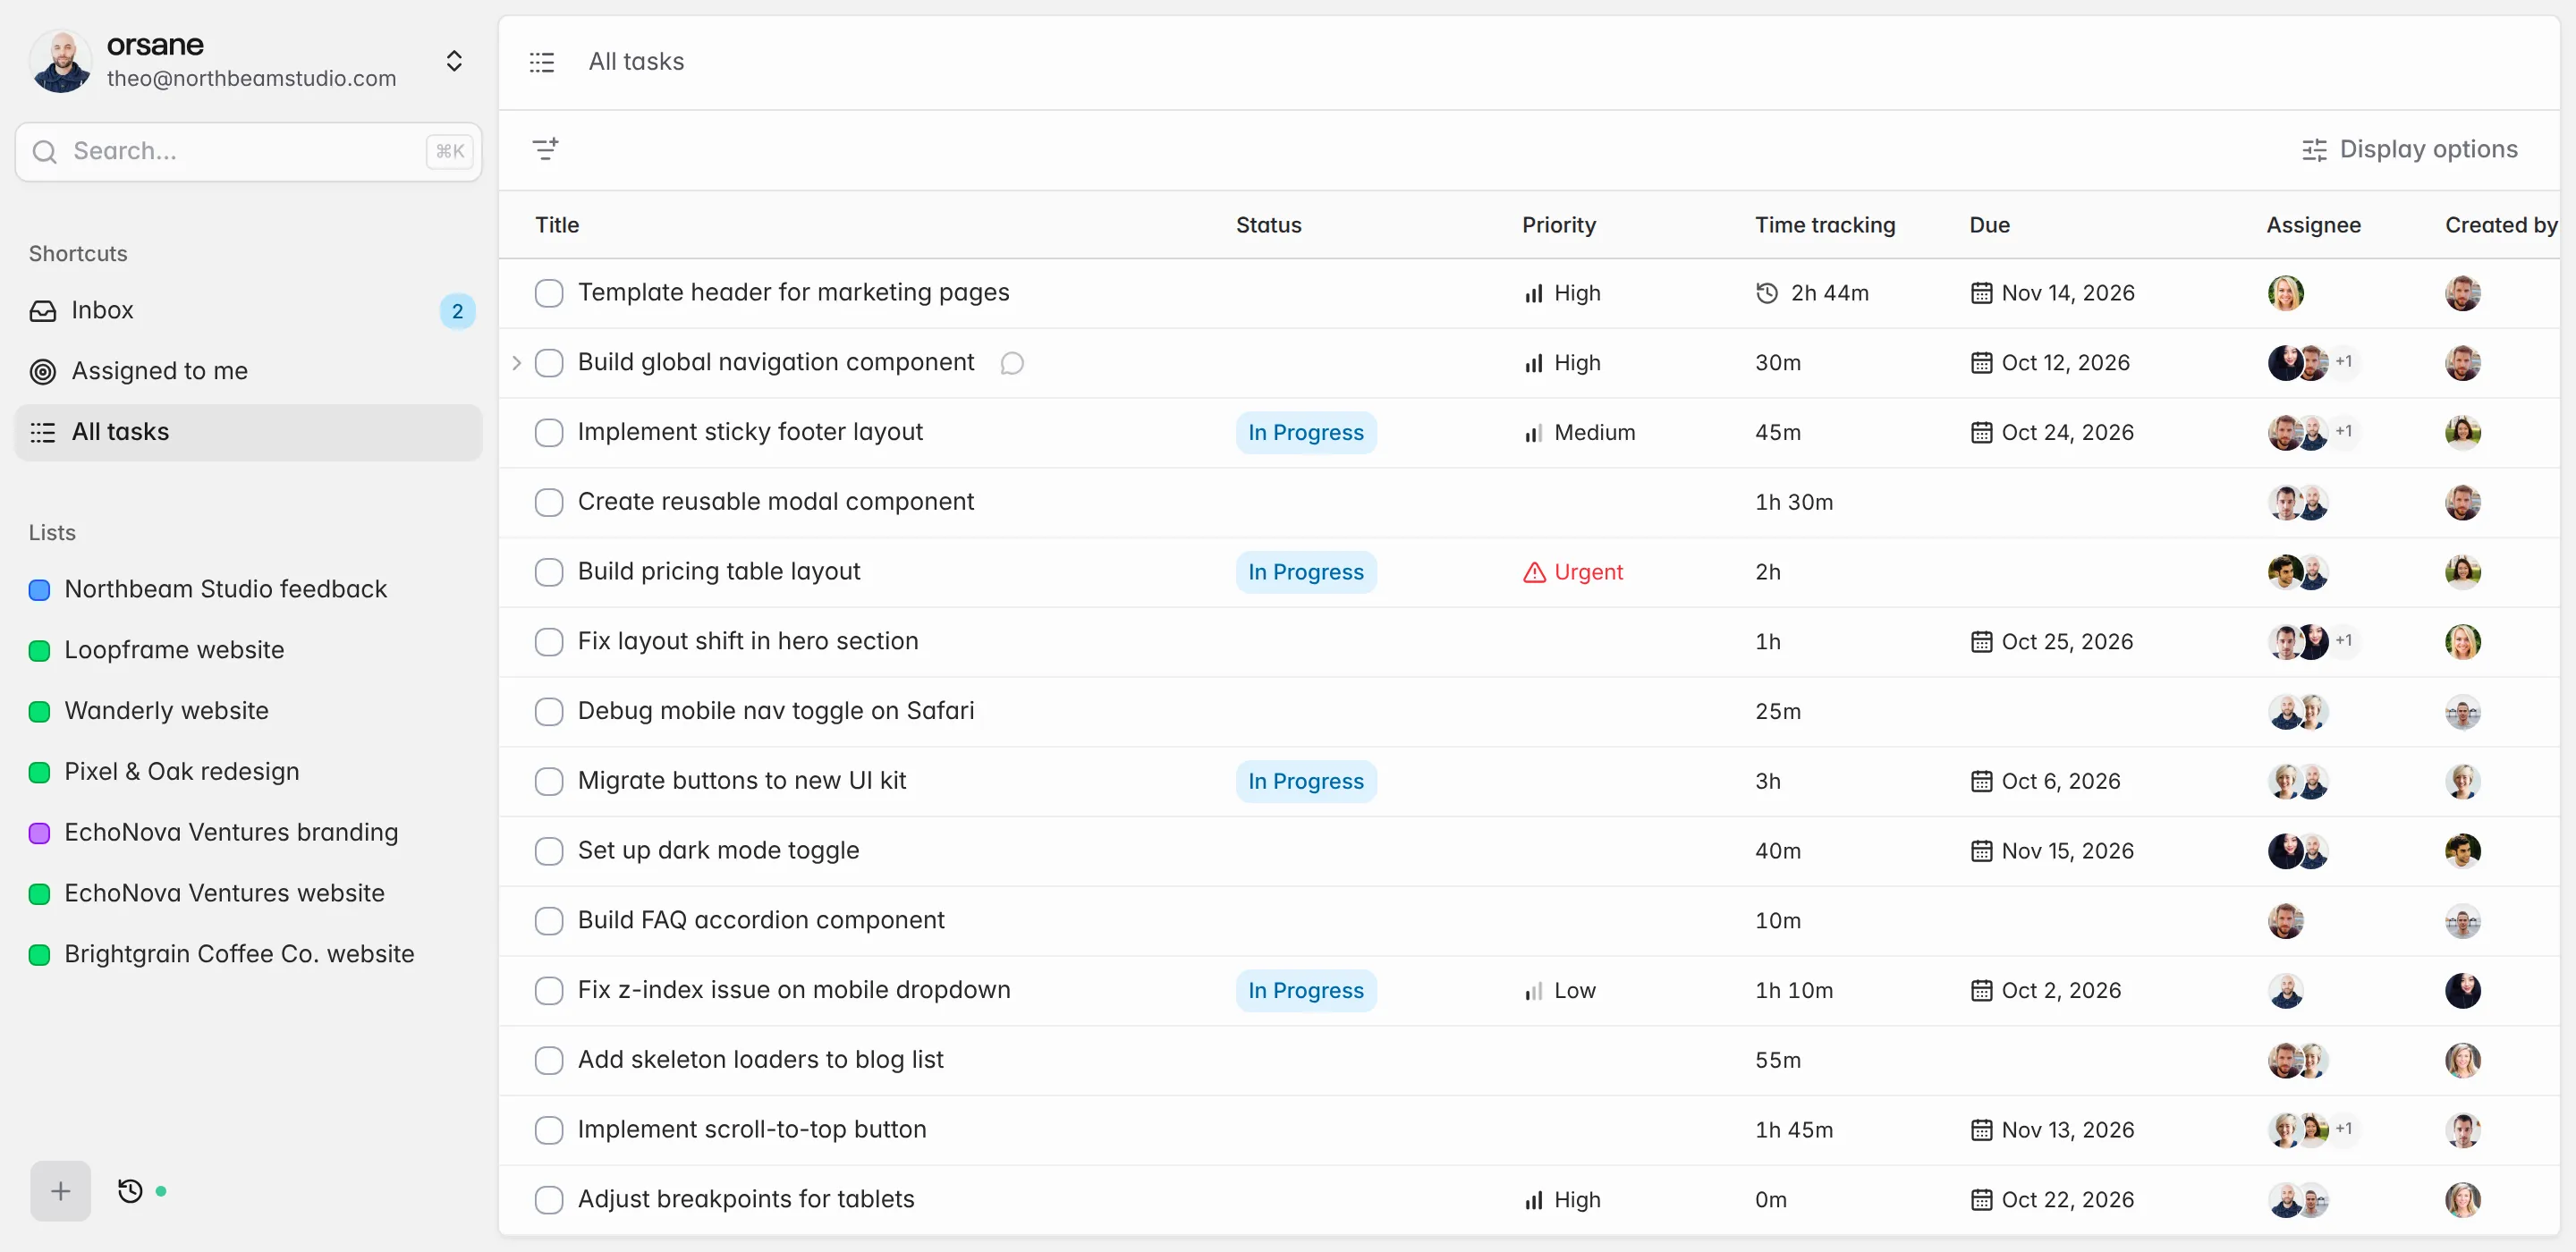
You can open the panel and start or stop recording straight from the column — no need to open the task first.
Duration formats
Section titled “Duration formats”Every duration box in the field accepts the same forgiving formats. Type whichever feels natural and Orsane normalises it when you tab out:
| Input | Interpreted as |
|---|---|
5 | 5 hours |
5.5 | 5.5 hours |
5d | 5 days |
5d 3h 20m | 5 days, 3 hours, 20 mins |
01:33 | 1 hour, 33 minutes |
1:33:20 | 1 hour, 33 mins, 20 secs |
Individual entries are shown as a clock — 0:25:00, 8:19:07 — so a running entry
and a logged one read the same way. The task’s total uses the shorter 8h 44m shape,
which is quicker to scan. You can type either format into any duration box.
What the total means
Section titled “What the total means”A task’s Timer value is the sum of its entries, including whatever is running right now — so the number you see on the task, in a list column, and in the sidebar keeps climbing while you work.
The task’s value is always rounded down to whole minutes. Four minutes fifty
seconds of tracked work reads as 4m on the task, not 5m — the entry itself keeps
the seconds and shows 0:04:50. Time you did not work is never invented.
Every change is recorded in the task’s activity feed like any other attribute edit.